I make no secret of the fact that I have always dreamed of having beautiful and thick lashes. Mother Nature, however, had other plans in this department. My lashes are weak, thin, and lacking curl. That’s why I decided to test out the Nanolash cluster lashes for DIY application. Did they work well in my case?
DIY Lash Extensions came into my hands as a test product. I was curious to see if I could actually do my own lash extensions at home. What’s more, the manufacturer ensures it’s possible in only 10 minutes. I wouldn’t be myself if I didn’t test it!
What can I say about DIY Eyelash Extensions for starters?
They say you can only make a first impression once. DIY Lash Extensions had their five minutes the moment I went to the manufacturer’s website. Did they manage to surprise me? It turns out that they did!
I noticed the huge variety of choices. A standard box of cluster lashes from Nanolash contains 36 lash clusters, of which:
- I had as many as 8 styles of lashes to choose from;
- the package includes lashes in 3 lengths: 10, 12, and 14 mm.
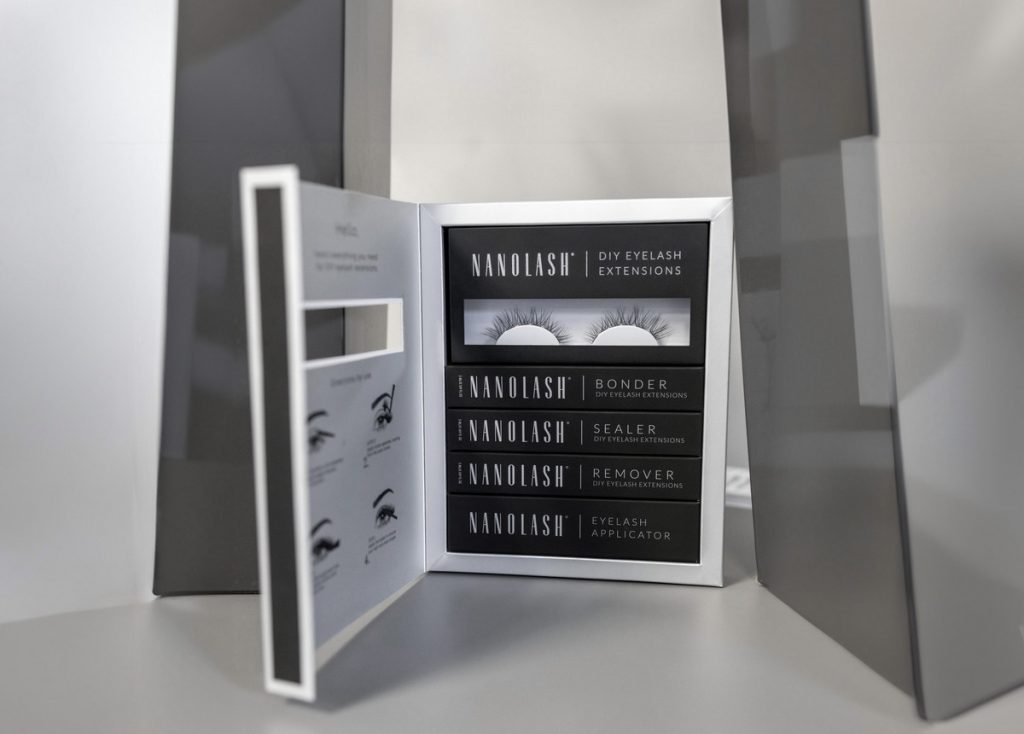
Of course, that’s not all! You can also get a complete eyelash extension kit, which includes the:
- 36 cluster lashes;
- Nanolash bonder;
- Nanolash sealer;
- eyelash tweezers;
- Nanolash remover.
All lash extension accessories are extremely efficient and will last a long time. This also applies to the cluster lashes for at-home application. On average, to create one lash look, I used about 4-5 ready-made clusters. According to my calculations, the box is enough for up to 4 applications!
DIY eyelash extensions with Nanolash lash clusters – was it fast and efficient?
The manufacturer clearly indicates that the lashes for DIY application at home last 5 days, and on top of that, you can apply them in only 10 minutes. Well, I decided to check it out!
After cleansing my natural lashes, I started by applying the bonder and the lash clusters in place. Of course, I turned on the stopwatch. The bonder takes about 30-60 seconds to get tacky. It is transparent and does a great job of unifying the color of the lashes. Then I started applying the clusters underneath my lashes, about 1 mm away from the lash line. Then I used one coat of the sealer and I was done!
The stopwatch showed 8:39, which is exactly how long it took me to do my own lash extensions at home, which I was extremely proud of. In a word, the manufacturer was not wrong. Easy lash extensions at home with Nanolash cluster lashes are possible!

After 8 days, my DIY Lash Extensions were still intact. This is Charm.
Was my application of Nanolash cluster lashes durable?
Another promise of the manufacturer is that the effects of a single application last up to 5 days. Once again, I decided to check it out. I applied for DIY Lash Extensions on Saturday when I wore them to a corporate event. I didn’t take my lashes off to sleep, and I also tried:
- sleep on my back – I didn’t want to expose the clusters to mechanical damage;
- brush them gently to remove dust;
- avoid oil-based cosmetics.
After 8 days, my DIY Lash Extensions were still intact. I decided to take them off to verify yet another claim made by the manufacturer. Well, the brand claims these cluster lashes are designed to be disposable.
I removed the DIY Eyelash Extensions using the remover and also removed the bonder residues from the thin strip. I checked the condition of the lash clusters – nothing had changed. The clusters did not curl or deform. In my opinion, you can safely reuse the clusters.

Can I recommend these false lashes for DIY application?
DIY Lash Extensions are a product I can recommend with a clear conscience. As you know, I usually speak openly if I don’t like something about a product. However, in this case, I didn’t find any flaws.
These cluster lashes are durable, lightweight, and comfortable to wear. I applied them in only 10 minutes, and the clusters lasted longer than the manufacturer indicated. If, like, you dream of a captivating gaze, DIY Eyelash Extensions are sure not to disappoint!


