Do you have short, straight and lackluster lashes? Do you have to use a lash curler and apply a lot of mascara to emphasize your eyes daily? I know these problems very well. Of course, beauty salons offer various great solutions, but I really don’t have time to spend long hours there. That’s why I was searching for a way to enhance my lashes at home. And I finally found it. Today, I will tell you about DIY lash lamination and introduce the best at-home lash lift kits. Check out my ranking and say goodbye to your lash curler once and for all.
What are lash lift and lash lamination?
Before I compare the products, I want to clarify two terms that often cause confusion. I’m talking about the lash lift and lash lamination. Although these phrases are often confused, they refer to two slightly different beauty treatments.
Lash lift mainly involves curling your natural lashes using specific formulas. As a result, the lashes are also visually longer, making the eyes appear bigger.
The goal of the lash lamination is to nourish and regenerate natural lashes using special solutions. This makes the lashes more moisturized, shiny, and healthy-looking.
While the results of the lash lift and lamination are somewhat different, these two treatments are often done one after the other. This not only improves the appearance but also the condition of the lashes. Previously, both processes were performed in beauty salons by experienced lash technicians. However, recently, it has become possible to perform the ash lift and lamination by yourself. More and more reputable beauty brands are offering complete at-home lash lift and lamination kits – I will compare these products below.
Best at-home lash lift and lamination kits – Ranking
When I found out that you can do your own lash lift and lamination at home, I had to try this method. I must honestly tell you that going to a beauty salon is very inconvenient for me. However, I still care about my appearance. So, if I have the opportunity to style my lashes myself, I must give it a go. It turns out there are a lot of lash lamination kits on the market. I tested five products, and I hope you’ll find your favorite in my ranking.
1. Nanolash lash lift and lamination kit
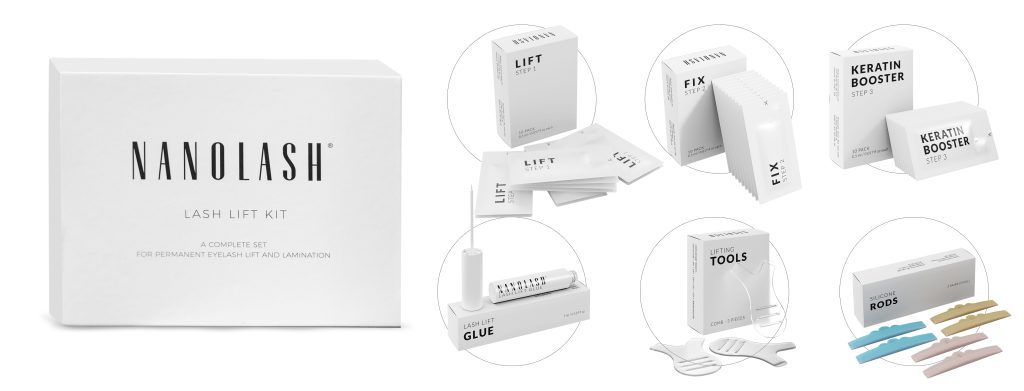
I’ve loved the Nanolash brand for a long time, so I was very curious when I discovered they offer a lash lamination kit. I have always been satisfied with their products, so I had high expectations in this case as well. And I was not disappointed!
The Nanolash Lash Lift Kit is a complete product with all the necessary items and accessories for the lash lift and lamination. The kit includes:
- 10 sachets of activator (Step 1);
- 10 sachets of neutralizer (Step 2);
- 10 sachets of keratin booster (Step 3);
- Glue;
- 3 pairs of silicone rods in three sizes (S, M, L);
- 3 lash combs.
With the detailed instructions and clear description of all the kit’s components, using it is straightforward. Both the formulas and accessories are of high quality, making the lash lamination quick and easy. It’s also worth noting the ingredients in the products included in the kit. They include hydrolyzed keratin, olive oil, avocado oil, grape seed oil, silk, arginine, and panthenol.
The kit includes three different sizes of silicone rods, which I think is a great feature. This allows every woman to choose the right tool for the size of her eye and the desired lash curl.
The Nanolash lash lift kit is also very efficient. It enables 10 full lash lamination treatments. After completing the lash lift, you can enjoy long, thick, and shiny lashes for up to 8 weeks. The lashes look so professional as if you’ve just left a beauty salon.
2. Elleebana Lash Lift – starter lash lift kit
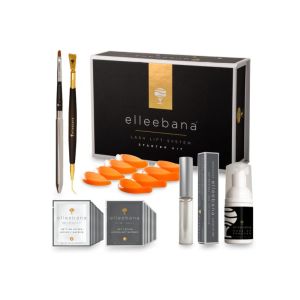
I was also familiar with the Elleebana brand.
Their lash lift and lamination kit is substantial – it contains all the necessary products and accessories, namely:
- 15 sachets of activator;
- 15 sachets of neutralizer;
- Glue with a brush;
- Eyelash lifter;
- Foam remover;
- Metal applicator;
- Silicone rods.
With this kit, you can perform up to 60 lash laminations, which sounds really impressive. Unfortunately, there’s a catch. Since the kit includes 15 sachets of activator and 15 sachets of neutralizer, you need to do four applications in a row to fully use both products. An opened sachet must be used almost immediately; otherwise, the product loses its properties. For this reason, Elleebana Lash Lift is more suitable for professional beauticians who perform many lash laminations throughout the day.
In this case, the lash lift process is quick and smooth. Although the instructions are in English, they are illustrated and easy to understand. The results are really good and long-lasting. However, I must emphasize that this starter kit is expensive – if you don’t have the chance to use the kit fully, it’s not very cost-effective.
3. RefectoCil Eyelash Lift
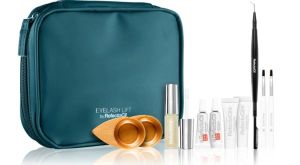
RefectoCil Eyelash Lift is also a complete starter kit for at-home lash lamination with all the necessary elements. This is a big advantage, as after purchasing this product, you don’t need to buy any additional formulas or accessories. The kit includes:
- 3 pairs of silicone rods in three sizes (S, M, L);
- 2 tubes of a lifting formula;
- 2 tubes of neutralizer;
- Eyelash lifter;
- 1 bottle of glue;
- 2 small cosmetic bowls;
- 2 brushes.
A stylish makeup bag that holds all the mentioned items is a nice addition. This is a big plus for me, as I travel often and struggle to find a suitable makeup bag to store my beauty products.
As for the kit itself, it allows for an exceptionally quick lash lamination process – all thanks to the specially-formulated products. With this kit, I managed to perform the lash lift in 15 minutes.
However, I have some reservations about the results. While my lashes were indeed nicely curled and looked longer, I felt that they weren’t nourished. With previous kits, the shine in my lashes was immediately visible, but I didn’t notice that here. The durability of the results wasn’t as good either, compared to the Nanolash Lift Kit.
4. Fleeky Lashlift Kit
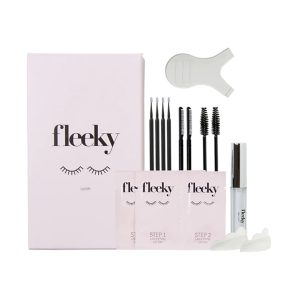
Next up is a vegan product – the Fleeky Lashlift Kit. It contains vegan, cruelty-free, eco-friendly formulas, which is an important factor for many people. The whole kit comes in an aesthetic box.
However, its content is significantly sparser compared to other products. Here, you’ll find:
- 2 Lash Lift sachets;
- Glue;
- 3 pairs of silicone rods in two sizes (S, M);
- 2 lash brushes;
- 2 lash combs;
- A tool for separating and combing the lashes;
- 4 applicator picks.
With this complete kit, you have everything you need at hand. The lash lamination process is quick and easy. Even if you don’t have experience with at-home lash lifts, you will achieve satisfying results.
After the lash lamination, your natural lashes will not only be curled but also visually longer. The durability is fine, though slightly inferior to my favorite kit. With healthy lash conditions, the effects last around 6 weeks.
5. Thuya Lash Lift Kit
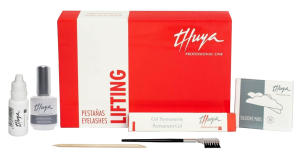
Lastly, I introduce you to an interesting 2-in-1 product, the Thuya Lash Lift Kit. The formulas in this kit are designed to work not only for the lash lift but also for brow lamination. The kit includes:
- Perm gel bottle(15 ml);
- Neutralizer bottle(15 ml);
- Glue (15 ml);
- Silicone rods in M size;
- Wooden pick.
As mentioned above, this is a versatile kit that can enhance not only lashes but also brows. Many women will appreciate this, but it doesn’t make a big difference for me. The kit is also efficient, as all the products have a large capacity, making them last a long time.
However, I consider the number of silicone rods a downside. The kit only includes rods in M size – S and L sizes have to be purchased separately. I prefer beauty products that provide more styling options for the lashes.
As for the effects and their durability, I must honestly say that there’s no “WOW” effect. Of course, the lashes were curled, visually longer, and moisturized, but I achieved much better results with previous products. In my case, the effects lasted around 5 weeks, so the outcome was decent but not impressive.
Lash lift and lamination step by step – tips
Since both these lash-styling methods are quite similar, regardless of the kit you choose, I will now explain how to perform the lash lift and lamination yourself. However, don’t forget to read the instructions provided with your purchased kit before use.
- Prepare the products and accessories needed for the lash lamination, so you have them within reach – this includes not only the kit’s components but also lash shampoo and a mirror.
- Cleanse your natural lashes thoroughly to remove any makeup residues, skincare products, and debris.
- Choose the right size silicone rods. Press them on your eyelids to check if they fit the shape and size of your eyes. If necessary, you can trim them to size.
- Place the rods on your eyelids and apply glue to them.
- Separate the lashes combed onto the rods (special lash combs included in the kits are usually used for this task).
- Now, apply the products in the kit in a specific order (as indicated in the instructions). Each product must be removed completely before applying the next one.
- Finally, remove the rods and brush through the lashes with a small spoolie.
- Avoid contact with water for about 24 hours to let the effects set. That’s it!


